
How to Sew Perfect Buttonholes: A Step-by-Step Guide for Garment Makers
Sep 2nd 2026
Adding buttonholes can feel like the most intimidating part of making a garment, but with a little preparation and practice, you can achieve clean, professional results every single time. Whether you are finishing a crisp cotton shirt or a structured jacket, here is a straightforward guide to mastering machine-made buttonholes.
1. Test and Practice First
Never sew a buttonhole on your final garment without testing first! Always take a scrap piece of your exact project fabric—complete with the same interfacing and layers you plan to use—and sew a practice buttonhole. This allows you to dial in your machine settings, tension, and feed before touching your finished garment.
2. Mark Your Placement Accurately
-
Horizontal vs. Vertical: Generally, horizontal buttonholes are best for garments subject to pull (like waistbands or fitted shirts) because the button stays securely at the end of the slot. Vertical buttonholes work well on plackets where there is less horizontal stress.
-
Marking: Use a fabric-safe chalk pen or a disappearing ink pen to mark the exact start and stop points of each buttonhole on the right side of your fabric. Measure your button’s diameter plus its thickness to ensure the marking length is exact.
3. Prepare Your Machine and Foot
-
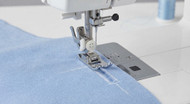
Attach the Buttonhole Foot: Swap your standard presser foot for your sewing machine's automatic buttonhole foot. Insert your button into the back slider of the foot if your model has a sizing slot.
-
Lower the Buttonhole Lever: Most modern sewing machines have a small metal drop-down lever on the left side of the needle housing. Make sure to pull this down completely, or your machine won't know when to reverse stitching.
-
Select the Stitch: Choose the standard rectangular buttonhole stitch on your machine.
4. Stitch the Buttonhole
-
Position your fabric so the needle drops directly onto your starting mark.
-
Lower the presser foot and start sewing. Most machines will automatically stitch the left bead forward, reverse a bar tack, stitch the right bead backward, and finish with a top bar tack.
-
Guide the fabric gently without pulling or pushing it; let the feed dogs do the work.
5. Cut Open the Buttonhole Safely
-
Use a Seam Ripper: Place a straight pin or a hand-sewing needle horizontally just inside the bar tack at one end of the buttonhole. This acts as a safety stop so your seam ripper doesn’t accidentally slice through your stitches.
-
Slice Cleanly: Insert your seam ripper just inside the bar tack and push it gently forward toward the other end.